Building the WriteFreely Action Extension in SwiftUI
Today, I want to talk a little bit about a new feature in WriteFreely for iOS: sharing from Safari.
One thing I love to do with the app is write up quick little notes on my iPhone as “titleless” micro-blog posts. These get posted to one of my Write.as blogs, and are then syndicated to various social networks. Posts like this are great for sharing a quick thought, or a snippet from a web page.
Doing the latter, though, is a bit annoying — it involves several round trips between WriteFreely and Safari, copying and pasting bits of information (the URL, the page title, and any selection of text) between the two apps, one at a time. Like an animal.
With version 1.0.8 —now available on the App Store— we've added an action extension for Safari that makes this task much easier.
How It Works
Essentially, iOS exposes an extension system that developers can use to extend their apps: this includes things like home-screen widgets, Siri shortcuts, and action extensions.
The action extension is a bit special, in that it lets users interact with one app from another app (typically via the Share button). In the case of the WriteFreely for iOS extension, Safari's Share menu gets a new entry:
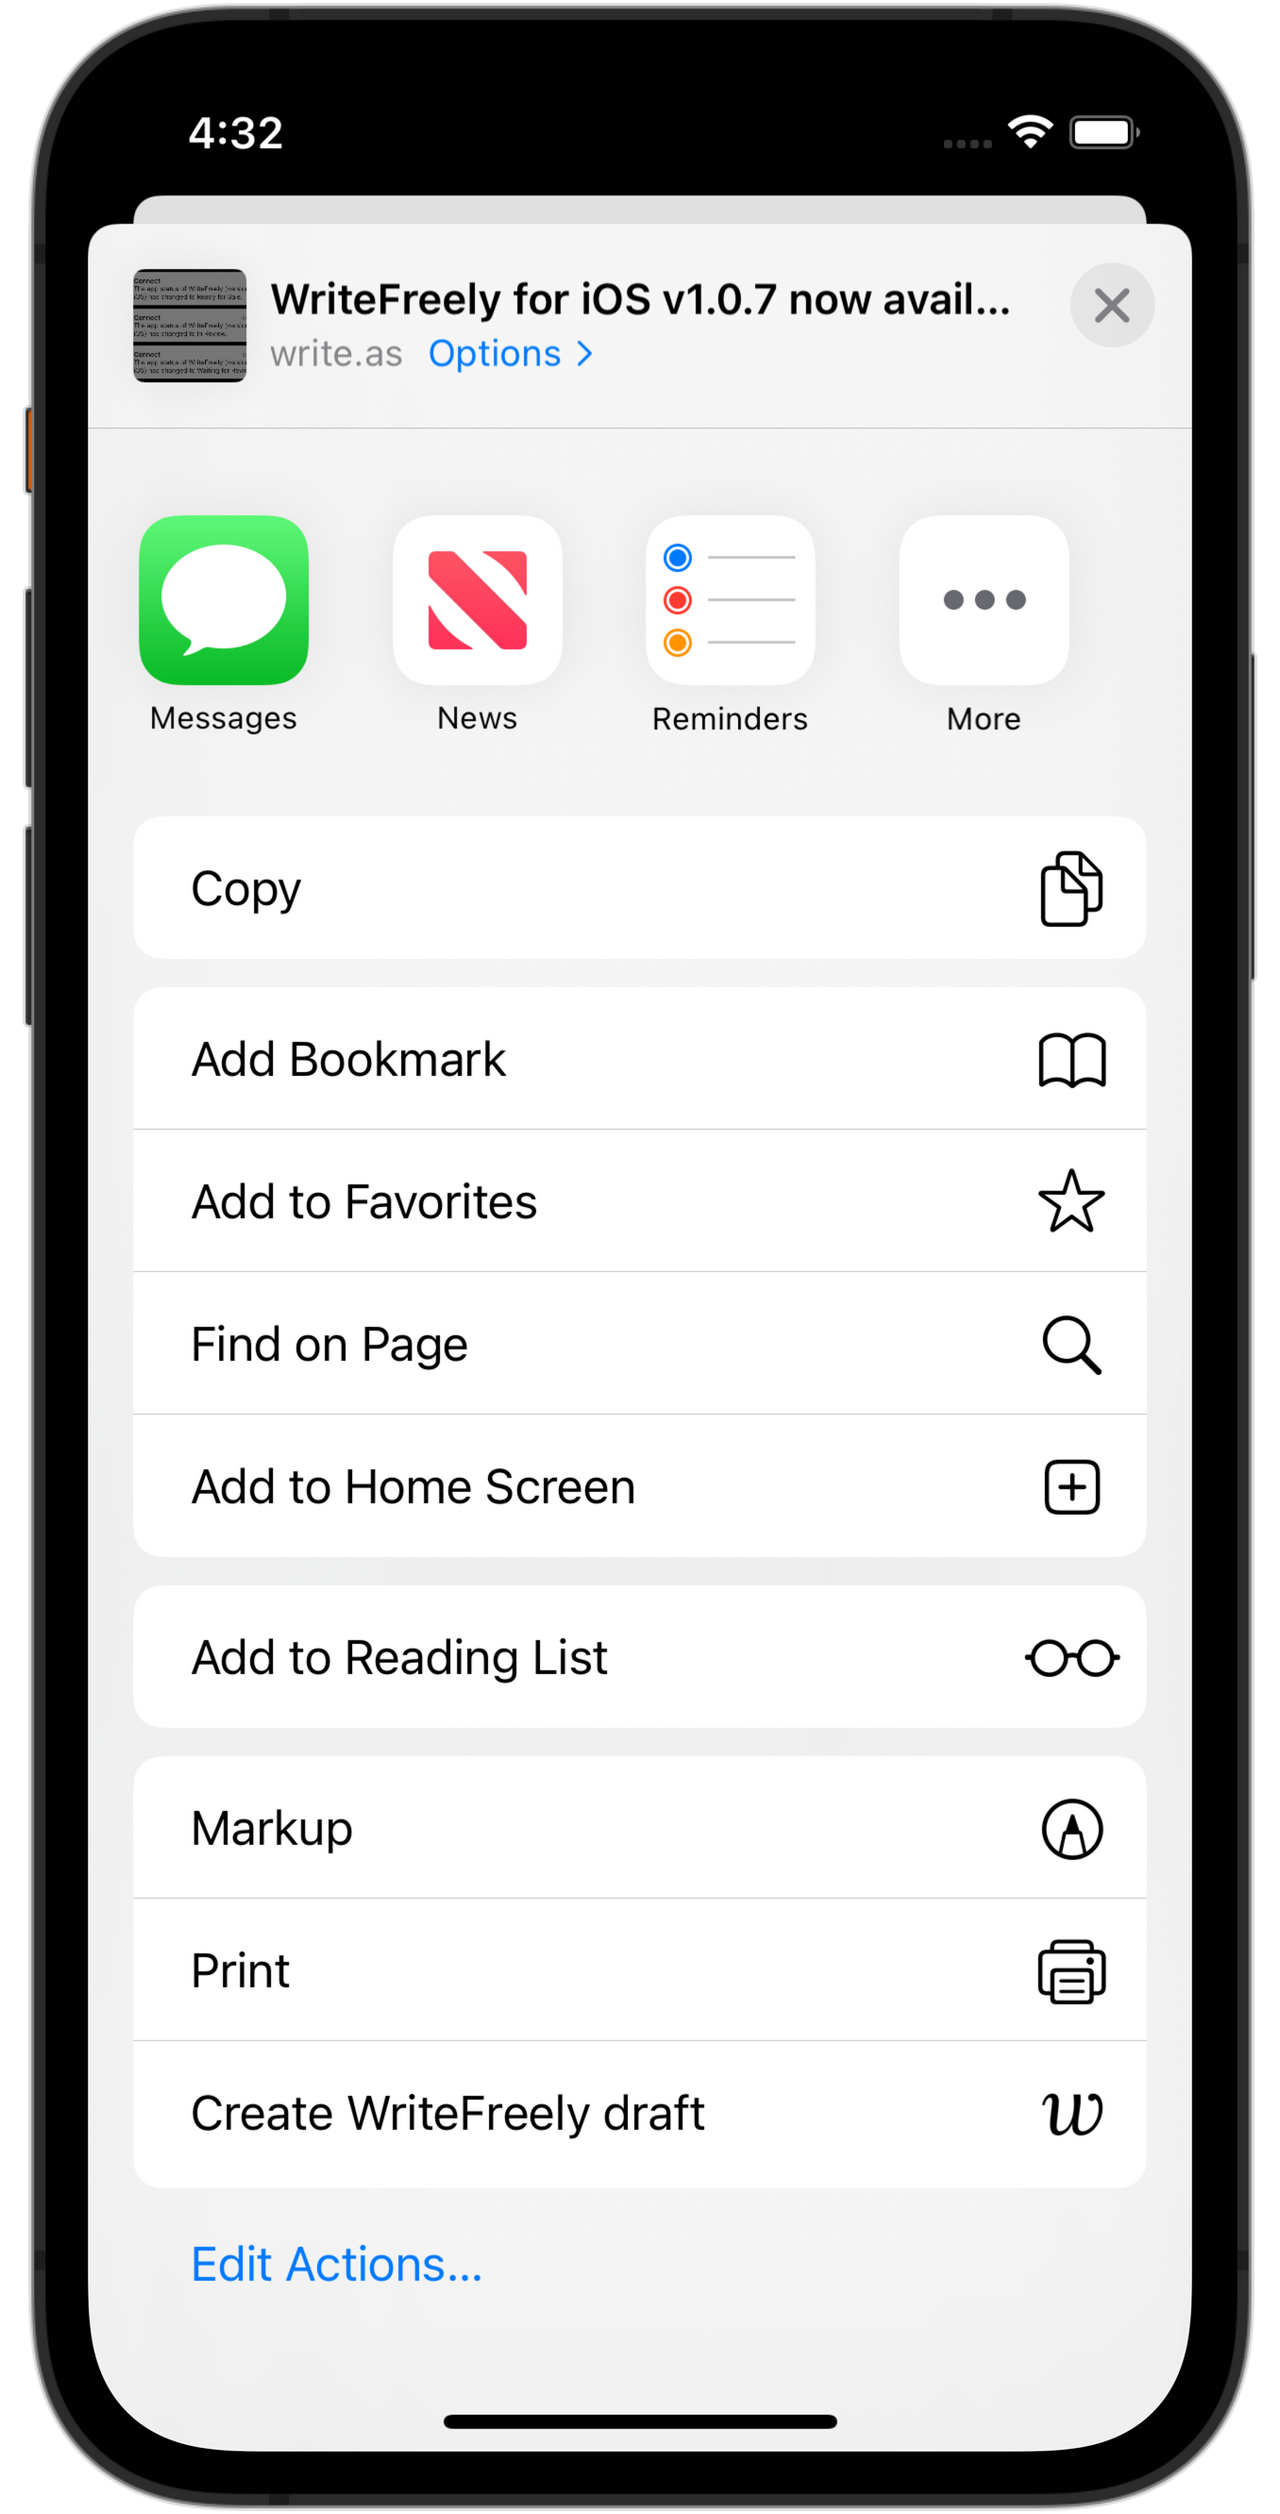
Tapping the “Create WriteFreely draft” option in the menu brings up the extension's user interface, which lets you create a note and save it as a local draft for a particular blog in your WriteFreely/Write.as account:

The Title field is optional; if you want to create a new draft with a title, enter it here. If not, leave it blank.
The Content field gets pre-populated with a Markdown link using the title and URL of the current webpage. If you've selected any text on the page, that's included too.
The formatting of the content is a little bit different, depending on whether there's selected text.
Without selected text, you just get the link. Add anything else you want to the Content field, before or after the link:
[Page Title](https://link-to-page)
If you have selected text on the webpage, then it's included as a blockquote before the link:
> This text was selected on the webpage.

Via: [Page Title](https://link-to-page)
Below that, the Save To menu lets you choose the blog to which you'd like to save the post. This is only saved to your iOS device, so you can always go back to the app and continue editing it before publishing.
How It Was Built
Building this functionality was done in a couple of steps (see the related GitHub issue). First, some data and preferences needed to be moved to an App Group so they can be accessed both by the WriteFreely and by its action extension. Then —as you might well expect— the action extension itself needed to be built.
Moving the Persistent Stores
WriteFreely for iOS stores information in one of three places on your device:
- Sensitive data like your access token, used send data back and forth between device and the WriteFreely server, is securely encrypted and stored in the system's Keychain.
- Various preferences and settings like the default font for new posts, your preferred colour scheme, and the last draft you were working on are kept in User Defaults, a simple key-value store.
- Your posts and blogs are stored in Core Data, backed by SQLite. Core Data isn't a database, but rather an object graph, and is great for storing data like this.
Extensions have limitations on what data they can access, so if we wanted to be able to save your new draft to that same Core Data store, or read User Defaults to render the text in your preferred font, those stores first had to be moved to an App Group.
Once that was done, the extension could be built.
Building the Action Extension
One of the goals of the WriteFreely app was to build as much of it as possible with SwiftUI, Apple's declarative framework for building an app's user interface. And since almost all of the app is built this way, why not try to do the same with the action extension?
As it turns out, there really isn't very much information on how to build one in SwiftUI. Sure, there are great tutorials on building an action extension —this one on Hacking With Swift in particular was helpful in getting the initial functionality working— but they all assume you'll be working in UIKit.
* * *
First, an aside.
If your iOS app was originally built in UIKit, and you want to start converting it over to SwiftUI, there's an API for that: UIHostingController. And it's relatively simple to use:
let swiftUIView = MySwiftUIView()
let hostingController = UIHostingController(rootView: swiftUIView)
I'm simplifying things a little bit, but this effectively embeds the SwiftUI view in the hosting controller, and you then use the hosting controller the way you would any other UIViewController.
So, in this case, we're working in reverse to what you'll usually come across in a SwiftUI-lifecycle app like WriteFreely: the need to add a UIKit-based view via UIViewRepresentable. I wrote more about that here.
* * *
Now, when you create a new action-extension target in your Xcode project, it spits out a template full of boilerplate code that you can use as a jumping-off point. And the key file you'd start off with is… a view controller.
(You see where this is going, right?)
By pulling out the placeholder code and using that class as a hosting controller, you can write the user interface for your action extension in SwiftUI, in all its declarative glory.
And that's what's going on in our action-extension target: we have the ActionViewController class, which sets up the environment and embeds the (SwiftUI) ContentView struct. The latter handles all of the layout and interaction, in just under 200 lines.
(Looking a bit more closely, you'll see that instead of a UIHostingController, the ActionViewController is instead using a UIHostingView. This isn't an Apple API, but rather something I found while searching for a way to write this extension in SwiftUI, in Blear — Sindre Sorhus' open-source iOS utility for turning photos into blurred background images.)
And that's how the action extension was built. Let me know how you like it!
Enter your email to subscribe to updates:
You can also subscribe via RSS or follow @angelo@write.as on Mastodon.