Philadelphia Patio Garden: The 2025 Season
I suppose I should kick off this blog by saying that I’m no expert gardener; rather, just someone trying to learn. My partner (Jon) and I recently bought a house in the great city of Philadelphia. It came with a modestly sized patio out back, which we’ve been working on ever since. The goal being to create something on a budget, with charm, yet something that could still be used to entertain and grow food and flowers. Not much to ask for in a ~100 square foot space, right? Anyway, along with that came the idea for this blog; I wanted a space to document our progress and figured it would be a great way to get feedback and suggestions from others.
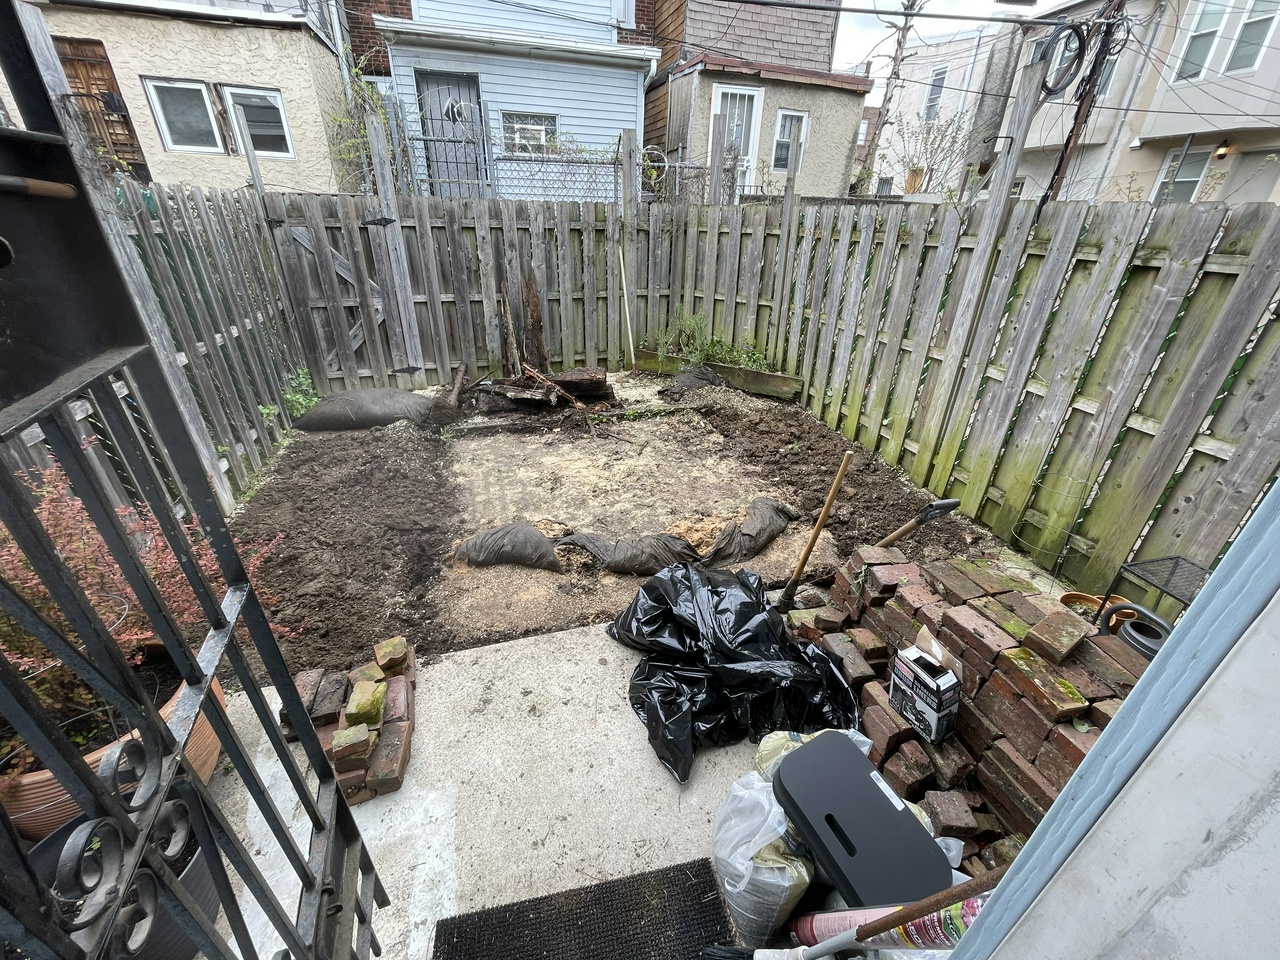
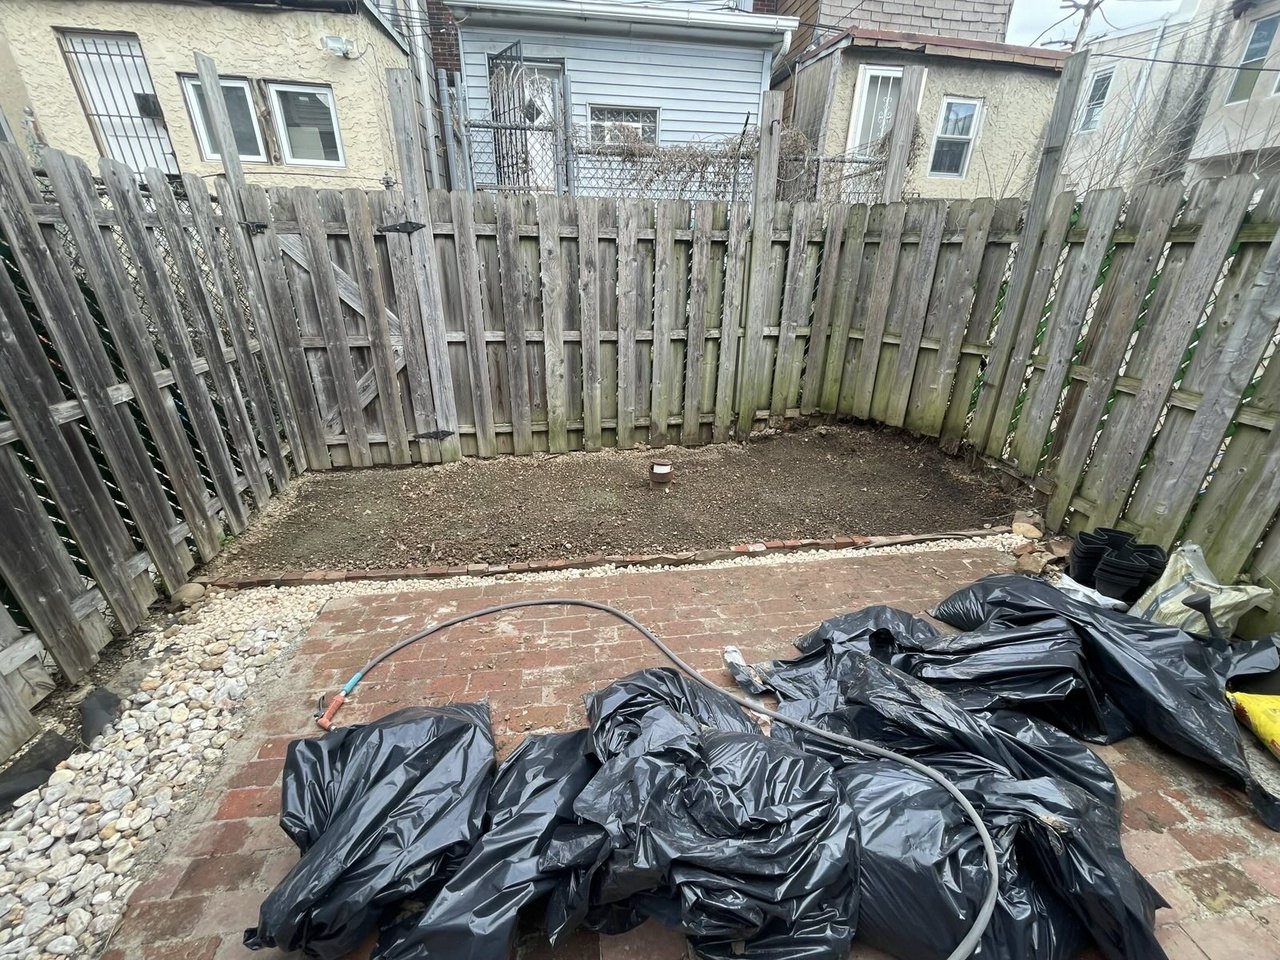
So let’s start at the beginning. Here’s a before picture of what the patio looked like when we first bought it:

Honestly, it didn’t look half bad, but there are a few issues:
- The brick patio had started to droop at the edges, where it was being held in place by rotting wood (how did the previous owners get this back here anyway?)
- The raised planter in the corner was rotted, and causing the fence to rot as well
- Too. Much. Gravel.
So, we got to work. First we started by salvaging any bricks we could re-use. The plan being to re-use the bricks in a different and larger layout. Taking out the bricks was about as tedious one might imagine, but it took no longer than an afternoon.
Underneath the brick was sand, which was used as the base for the patio. We dug it up and put it into trashbags, along with some of the gravel. The lumber they used to edge-guard the brickwork had completely rotted, so it was surprisingly easy to get out. Once that was out we got to work digging out the dirt on the sides, and prepping the surface:

As you can see in the picture, the trash bags were beginning to pile up, making the space harder to navigate and work in. We started tamping same gravel stone into the ground, trying to even out the clay dirt, which was stubborn and otherwise didn’t want to conform. The surface needed to be at a 1˚ slope, angled away from the house. We used poles with twine on them to measure out the slop and distance from the ground, before tamping some more gravel stone into place. Once it was roughly where we needed it to be we added 10-year rated weedguard:

After that, it was time for the sand. We put down a layer of paving sand, about an inch high, which we used 1” PVC to measure out. We screeded the sand, prepared the edge guard, and then set down some paver base panels (being held in place with bricks in the following picture):
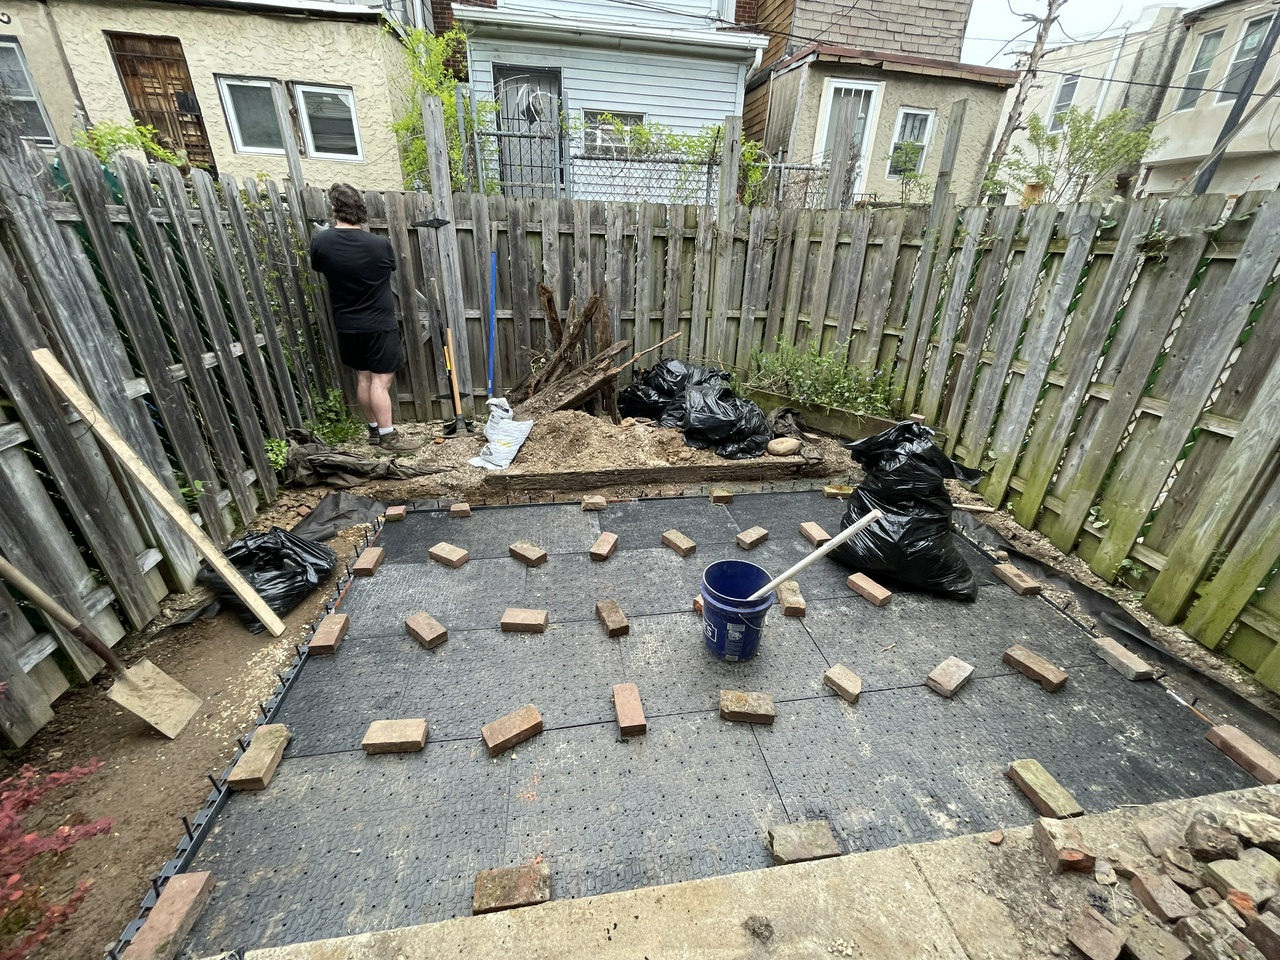
All of this, mind you, is over a month’s worth of work having been exclusively working on weekends and after our 9-5’s. Eventually, it came time to do the tile work (look at Jon’s enthusiasm):
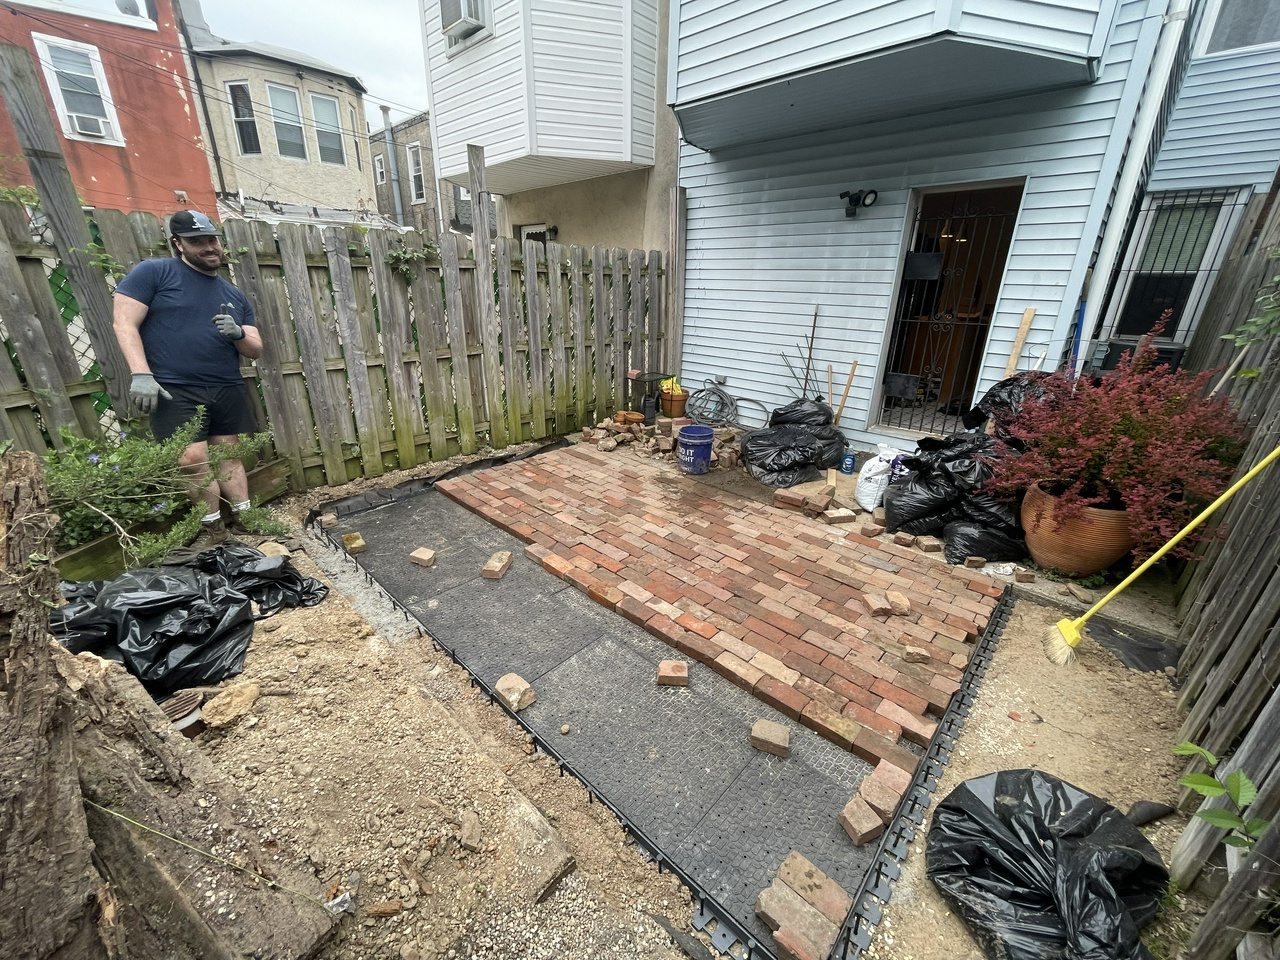
Using the same bricks from the old patio, plus some Facebook marketplace freebies, we got to work laying down the new pattern. We chose to do the standard offset horizontal pattern, mostly because we knew we had a lot of half broken bricks, which would make for great edge pieces. Here’s the patio with most of the bricks in place:
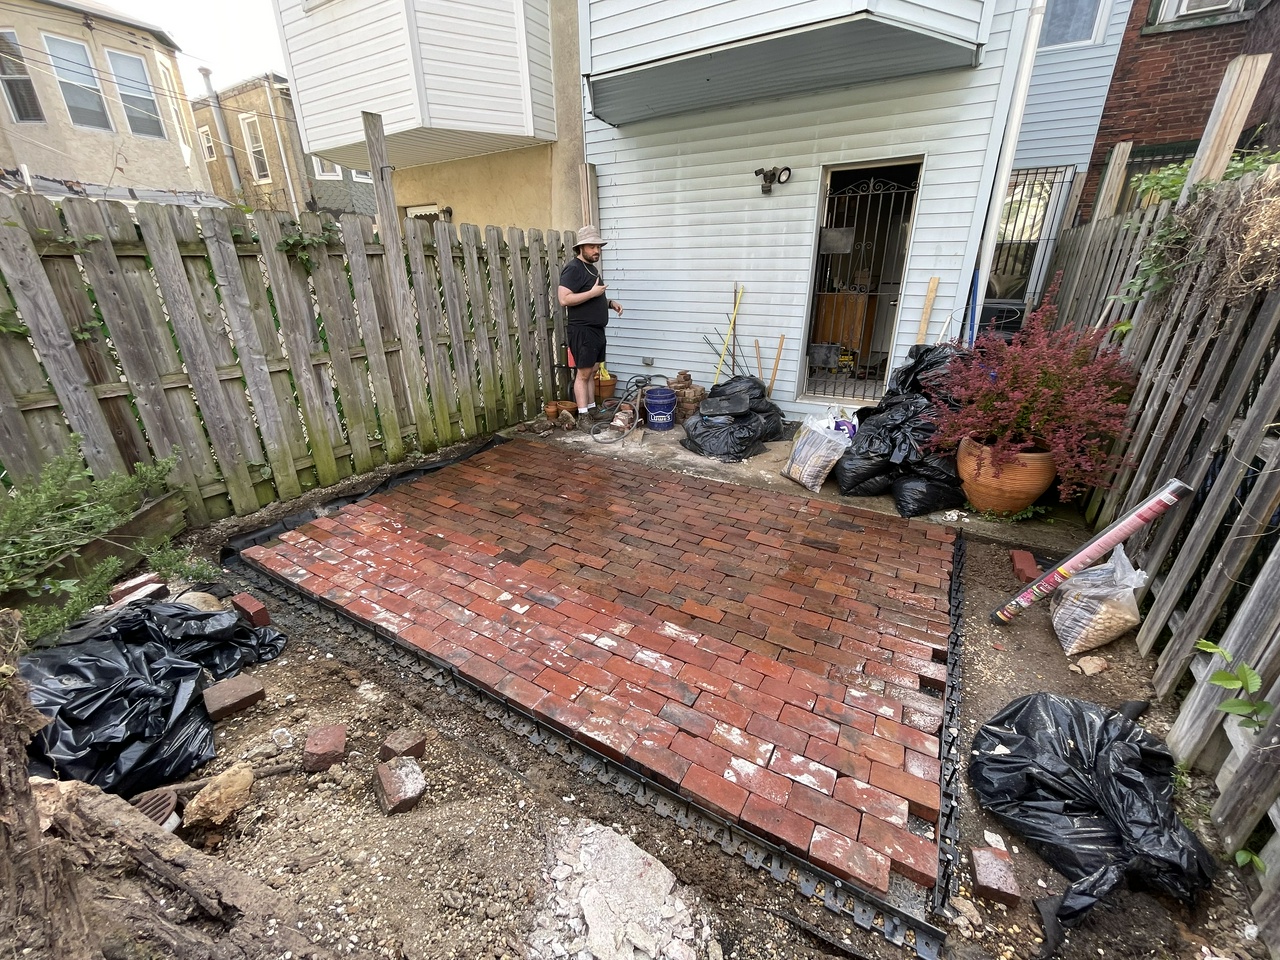
You can see the difference in color between the original bricks and the free ones. It looks drastic here after a minor power wash, but over time these will begin fade and look the same. Anyway, along the sides we added some stones to keep the weedguard in place and act as a drainage site for a raised garden bed:

Lastly, we dug out the rest of the dirt near the back half of the space, and used the remaining bricks to act as a small retaining wall. We left a little room between the wall and patio so we could continue the stone all the way around the brickwork:
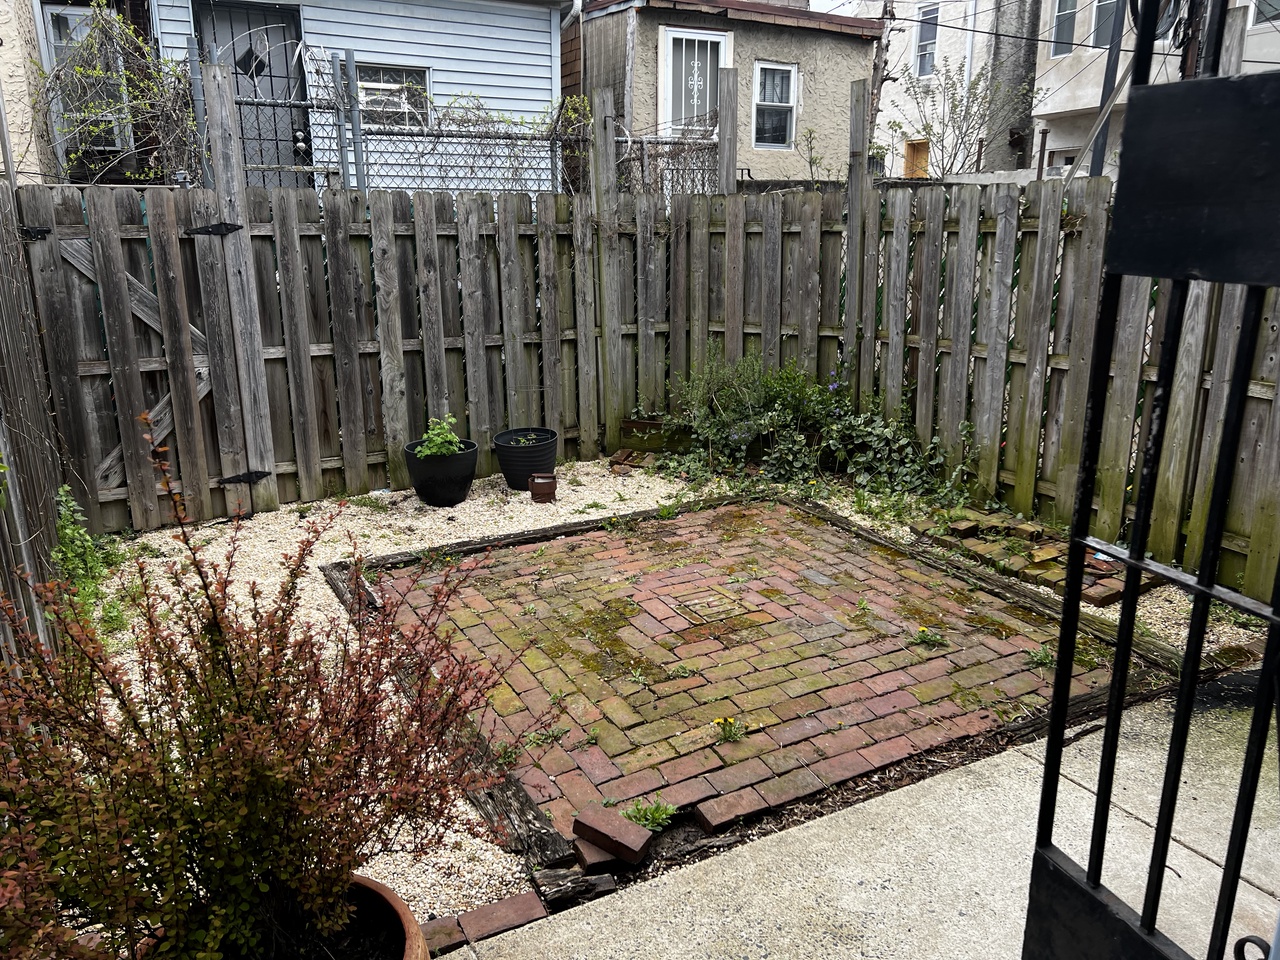
The space was finally ready! We had a crew from EZ Cleanup come and take the trash bags (highly recommend them btw, they were great), which finally left us with working space again! We refined the dirt portion so it was more-or-less level, and put in the raised garden beds. Which finally brings us to where we are today, almost a year out from when we purchased the house:

We laid down some grass and clover mix to help fill in the space and start fixing the soil. At some point we plan to plant flowers directly into the ground, but it needs about a year or so to get to a state where the soil is more hospitable to plants.

And just a quick reminder of where we started:
In the next few weeks I’ll post some more updates on what we’re actually planting in the beds and around the garden. Stay tuned!
-Roman