Barbecue briefcase, tools and shakers
Originally written Jul 24, 2020
For the 2020 Barbecue Swap that I ran, I decided to make a kit of bbq tools, along with a small briefcase to hold them. Given that I'm still settling into my shop, I figured this would give me the ability to switch between the different components as I needed to find tools, rearrange my bench, or other distractions. I'll try to break this into three sections, the briefcase, the tools, and the shakers.
The briefcase
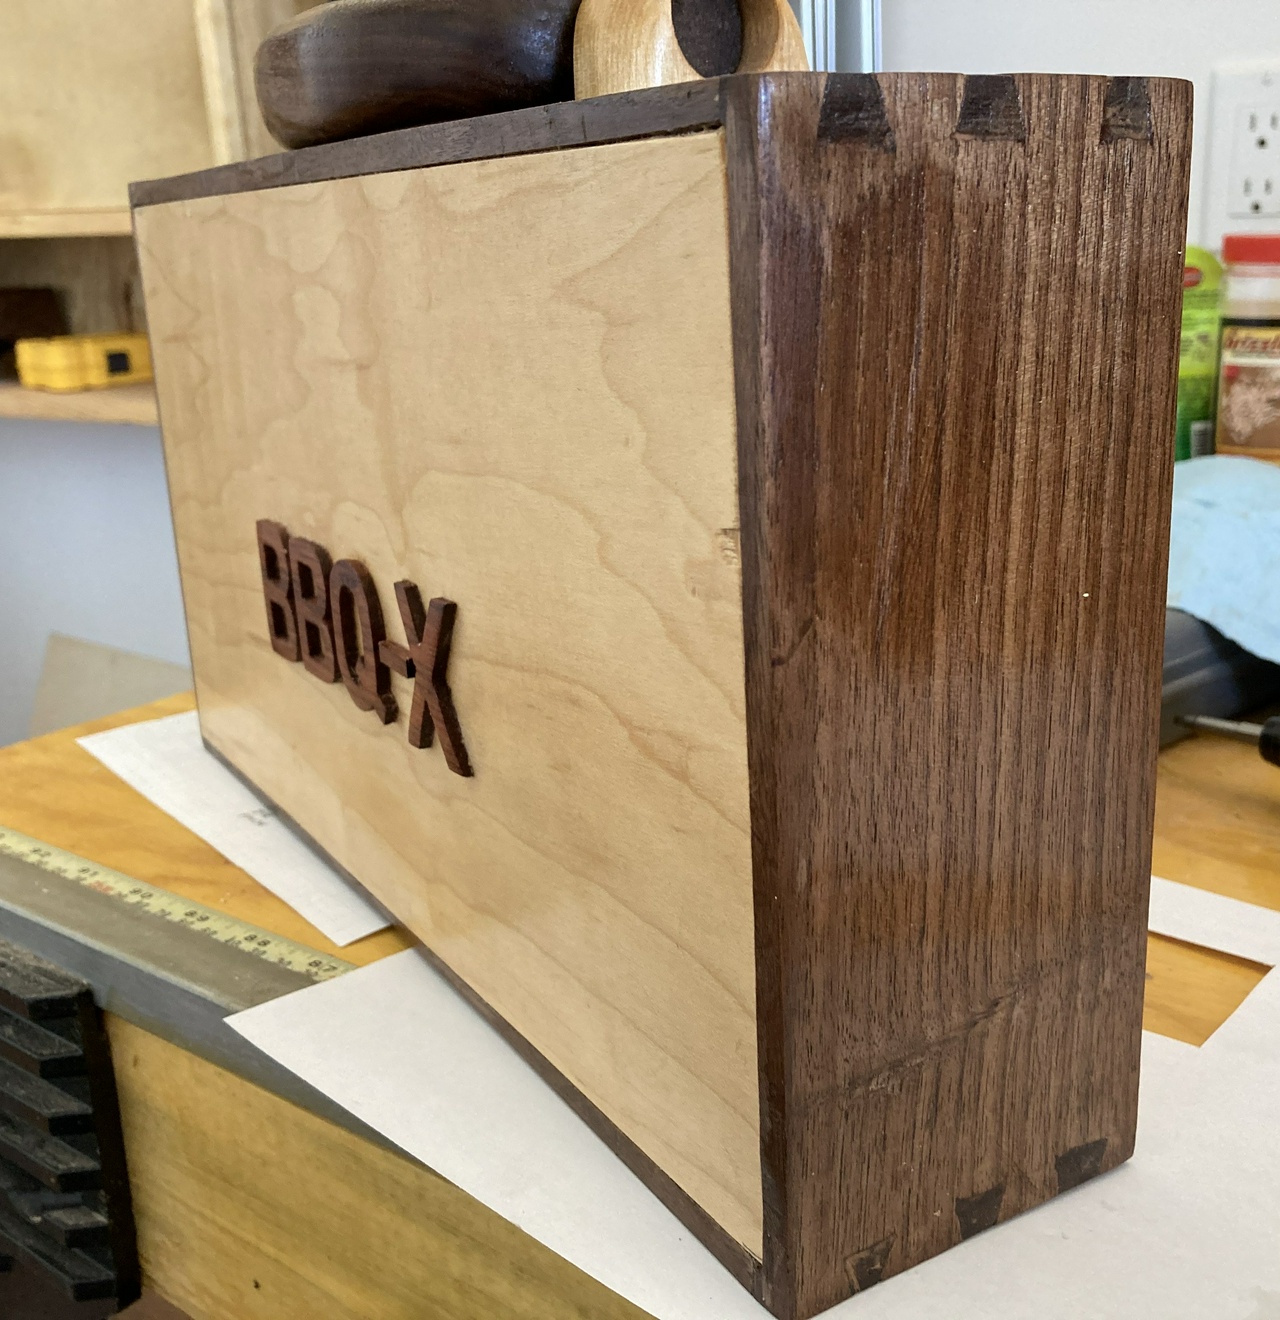
I wanted to make sure the briefcase fit into a USPS medium flat rate box so I looked that up and figured my briefcase had to be about 13-¾ inches long at longest, about 8 inches wide, and a little more than 3 inches thick. I cut a piece of walnut I had down into two book-matched pieces that were 22 long and 3¼ wide by about ⅜ thick. I roughly smoothed the outside of the pieces, but left the rough, inner, book-matched surfaces alone for now. Those would become the outside of the box, and I've found that it's easiest to smooth them after I've assembled the box, especially when working with thin stock.
I cut grooves near the edges of the wood, which would be the grooves that held the top and bottom of the case. Did ¼” grooves, about an eighth from the edge of the board.
Then I dovetailed the ends, paying some attention to where I would want to cut the box open, and trying to lay the tails out so I would be sawing a tail in half when I cut the box open. And rather than assemble the top and bottom of the box immediately, I planed off the spare eighth turning the groove in the boards into rabbets.
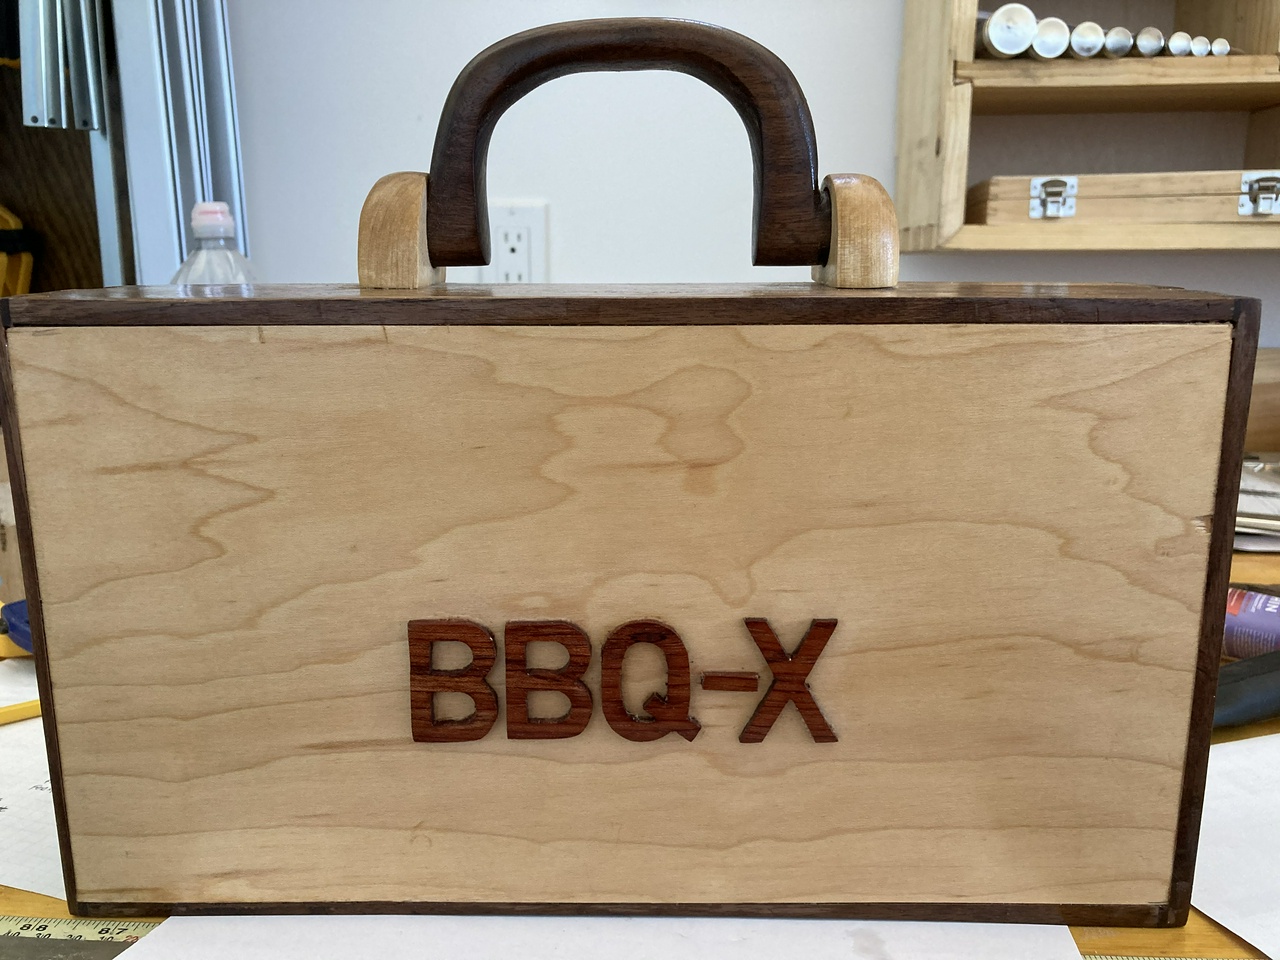
I also sanded and finished the front panel of the case at this point so when I put the handle on it, I wouldn't have to try and sand around that.
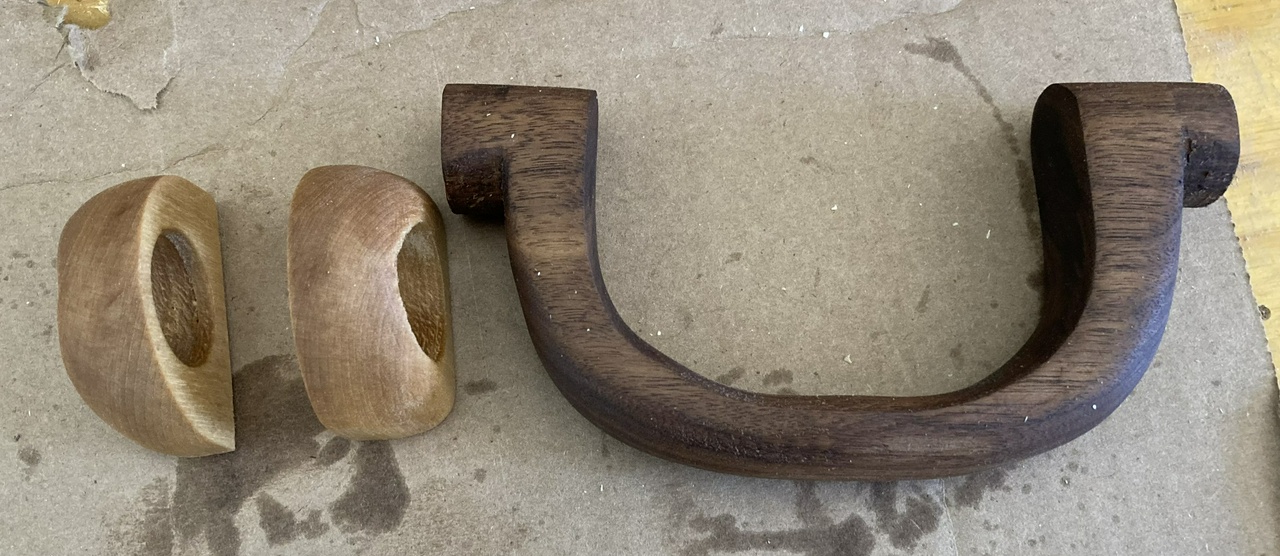
The handle was a piece of 4/4 walnut, hand-carved to a handle shape. I then made octagons on the end of it, guesstimated they were going to end up about an inch in size, and drilled a one inch hole in a piece of birch. I then cut it in two, and hand-shaped it to make brackets to hold the handle, and then turned down the ends of the handle to match the holes using my hollow auger. I also drilled a couple holes to align the handle brackets while I could still get inside the box to clean up the holes.
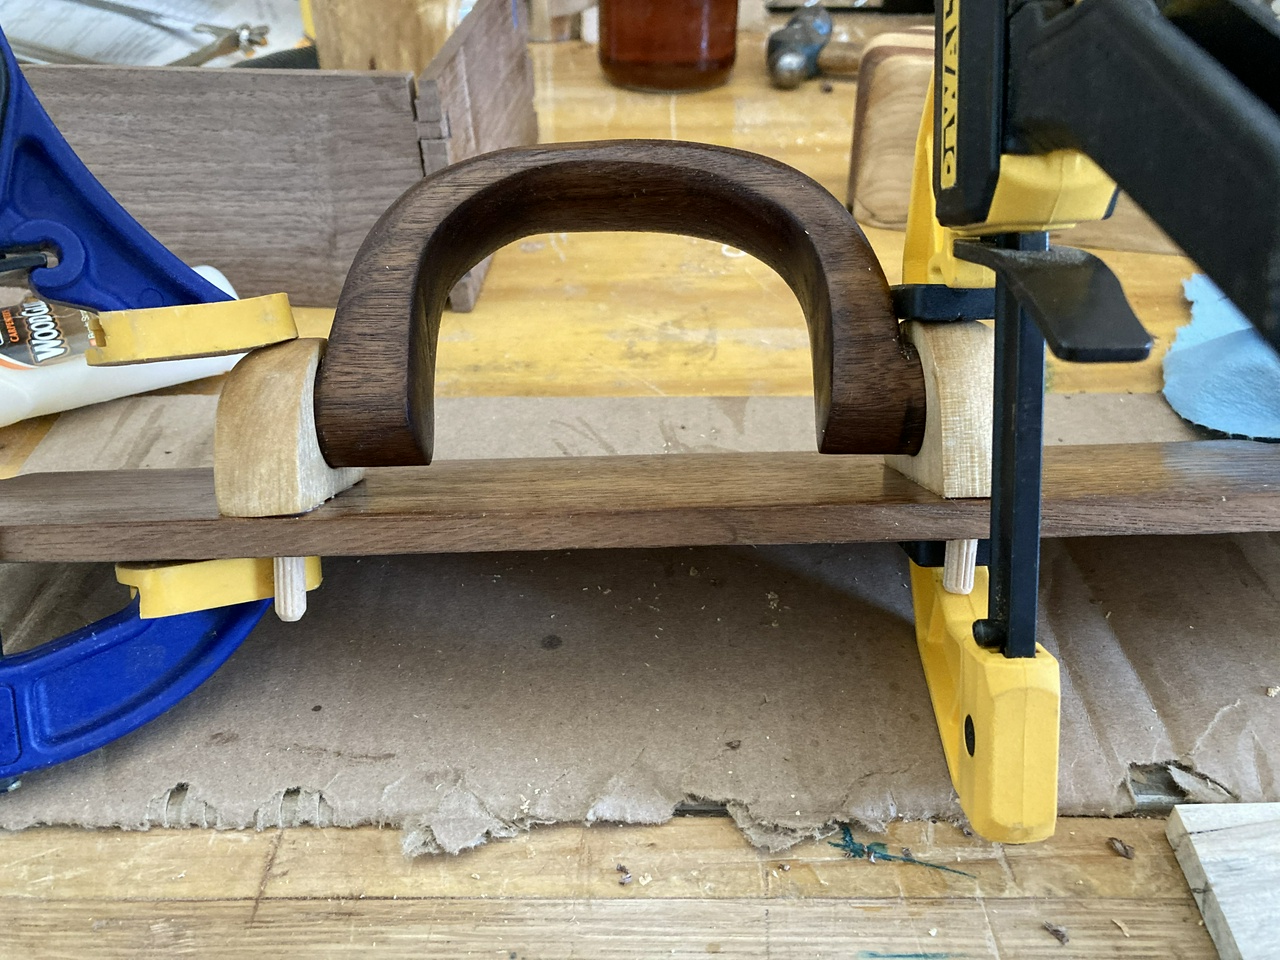
I glued up the dovetails, and just set the top and bottom of the box in place for now to help keep things square. And then I took the case to the belt-sander to finish sanding the sides.
That done, I finished the exterior of the case. This included cutting the BBQ-X letters from some thick (1/8” or 3/32”) bubinga veneer, hand sanding them, and gluing them to the lid. I oiled the box, handle, brackets, lid and bottom, and then glued on the letters, and glued the top and bottom into their rabbets, and glued on the handle. Clamping everything took a little improvisation.
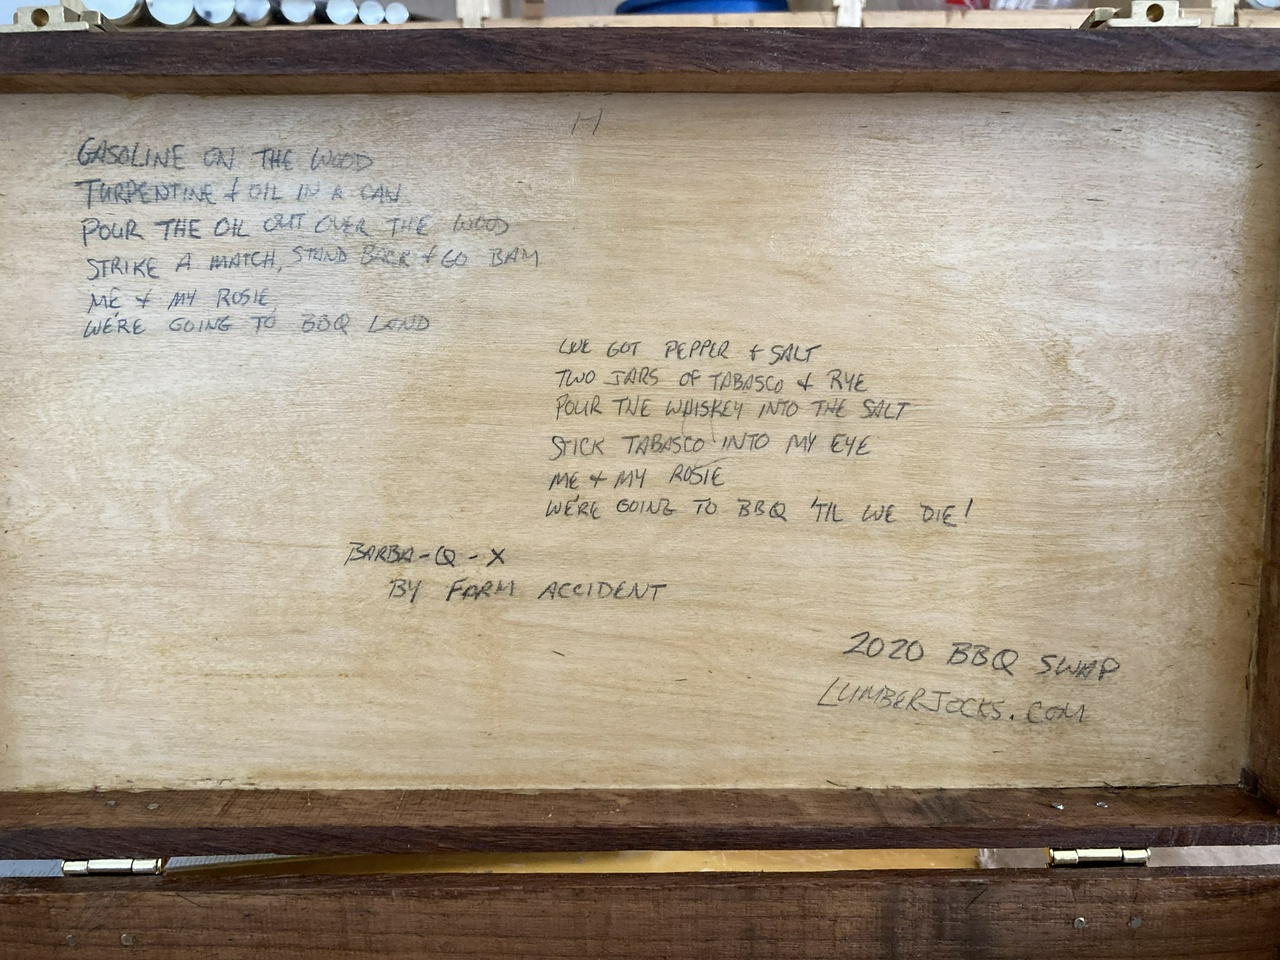
The name comes from a song by the band Farm Accident, who were friends of mine who played in Minneapolis back in the 1980s. If you look at the third picture, you can see the lyrics to the song, which I wrote on the inside of the box.
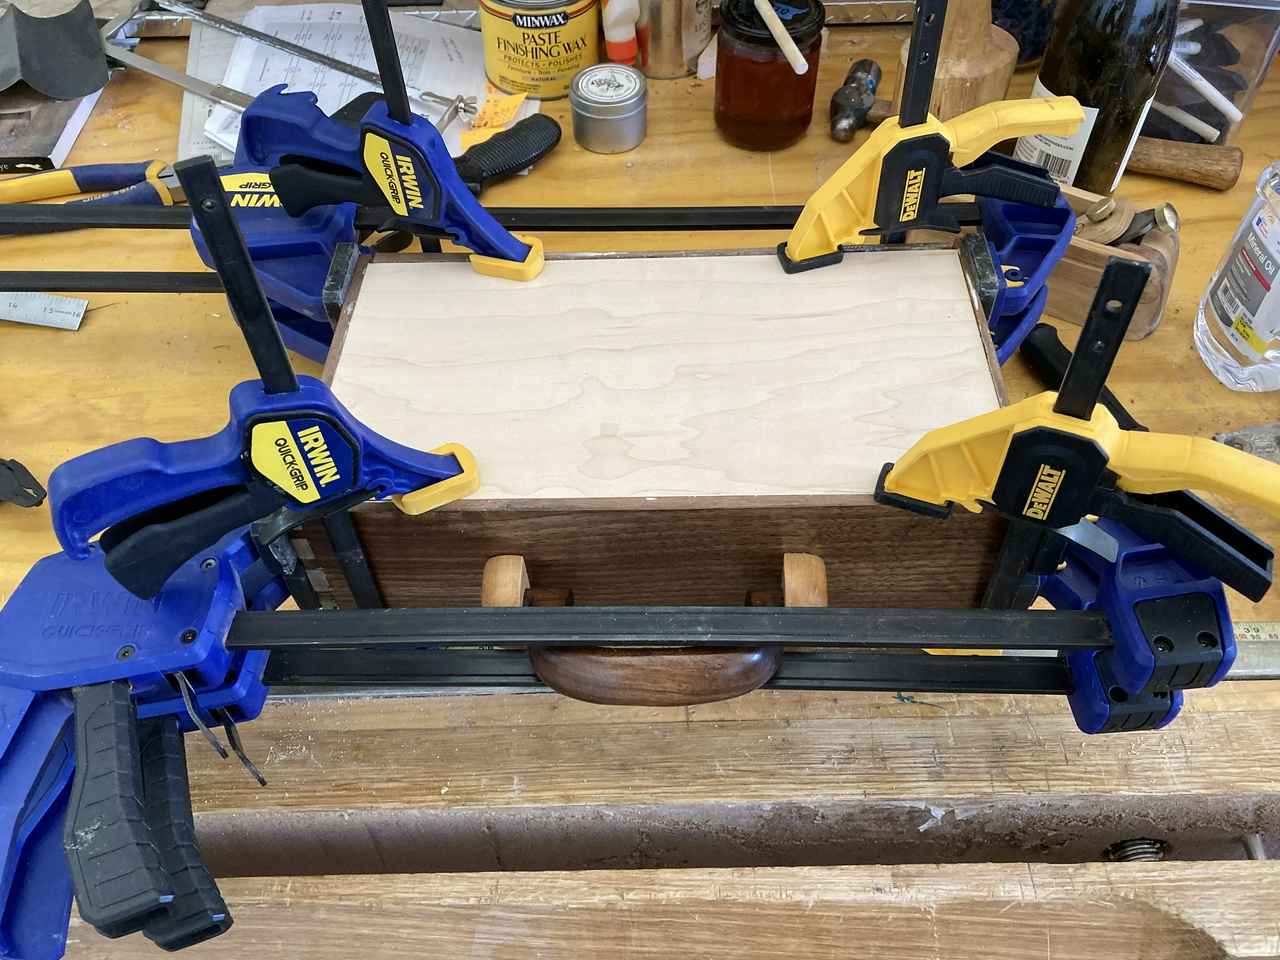
The box assembled, I hit it with four or five coats of super-blonde shellac, padding it on. Then I cut the box open, put on the hinges and latches, and called it done.
Whew!
The Tools
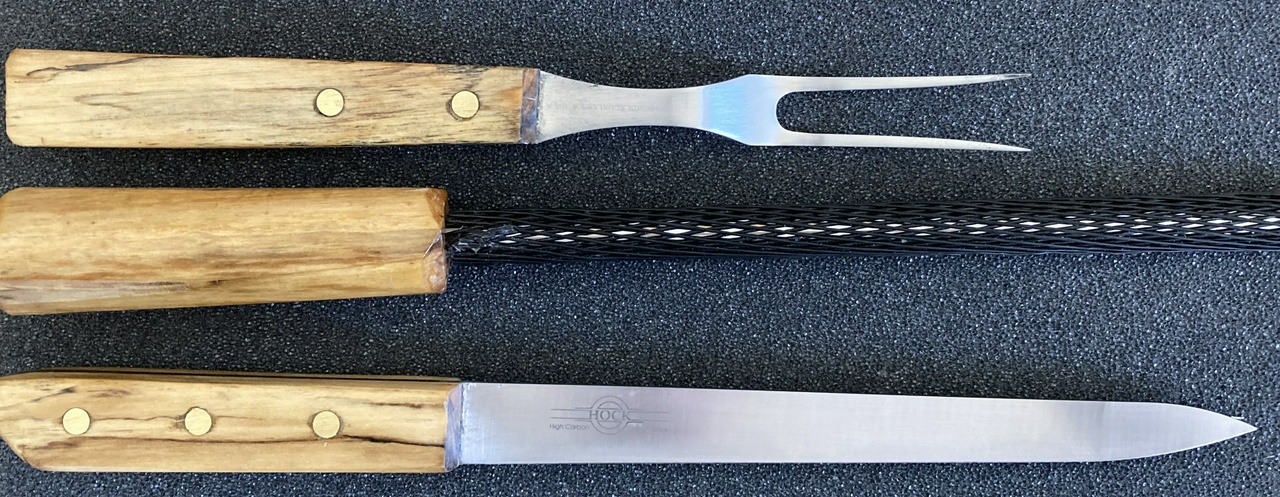
The tools were made with stabilized birch for the handles. The birch came from Timber Bay Resort in Babbitt, MN. There had been a big wind-storm just before we went up there in 2018, and I scavenged a bunch of birch, brought it home, sliced it up, and stabilized it.
The knife and steel are from Hock Tools. Ron Hock is a great guy, and when I asked him about a barbecue fork, he said he didn't make them, but suggested the steel (which I had forgotten they made) and pointed out that he sold aprons which were certainly bbq related. Nice job up-selling me, Ron! The fork ended up being from eBay. I bought one that had a rough-looking handle, but was made in US steel, peeled the old wooden handle off, and put on a new handle. Nothing too fancy with the tools, but I left them slightly oversized so Grant could reshape them if he liked.
The Shakers
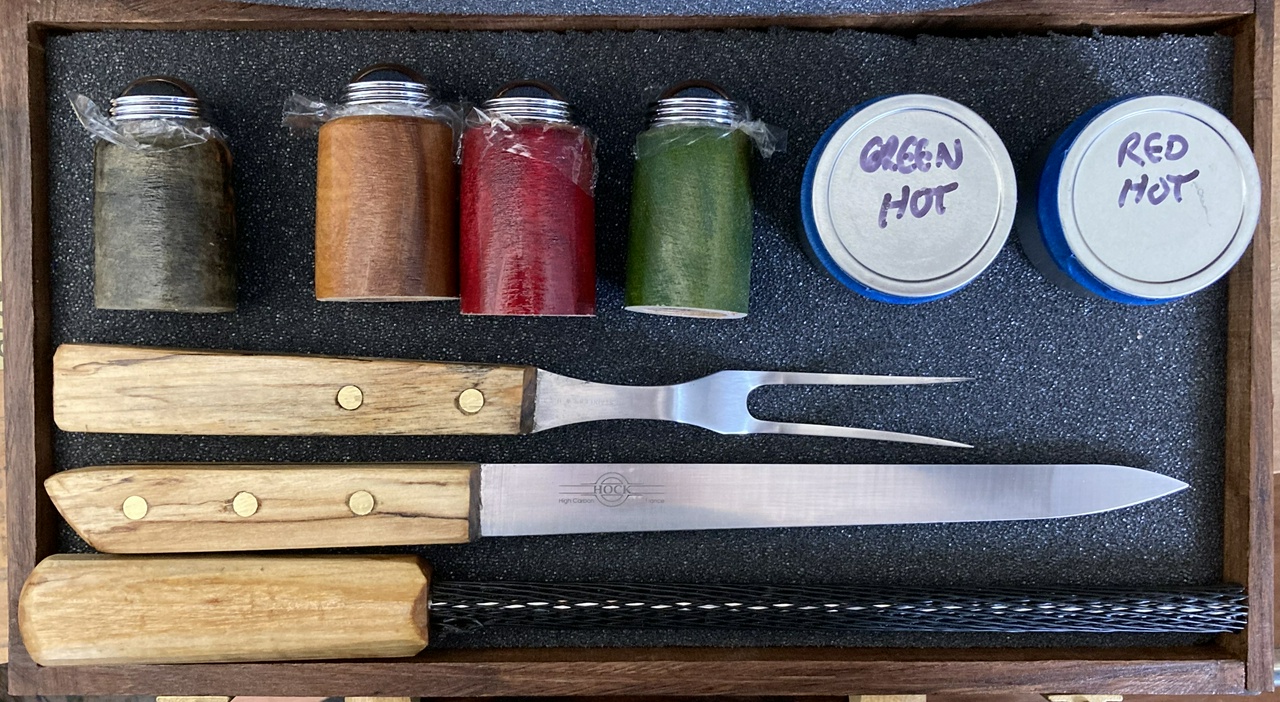
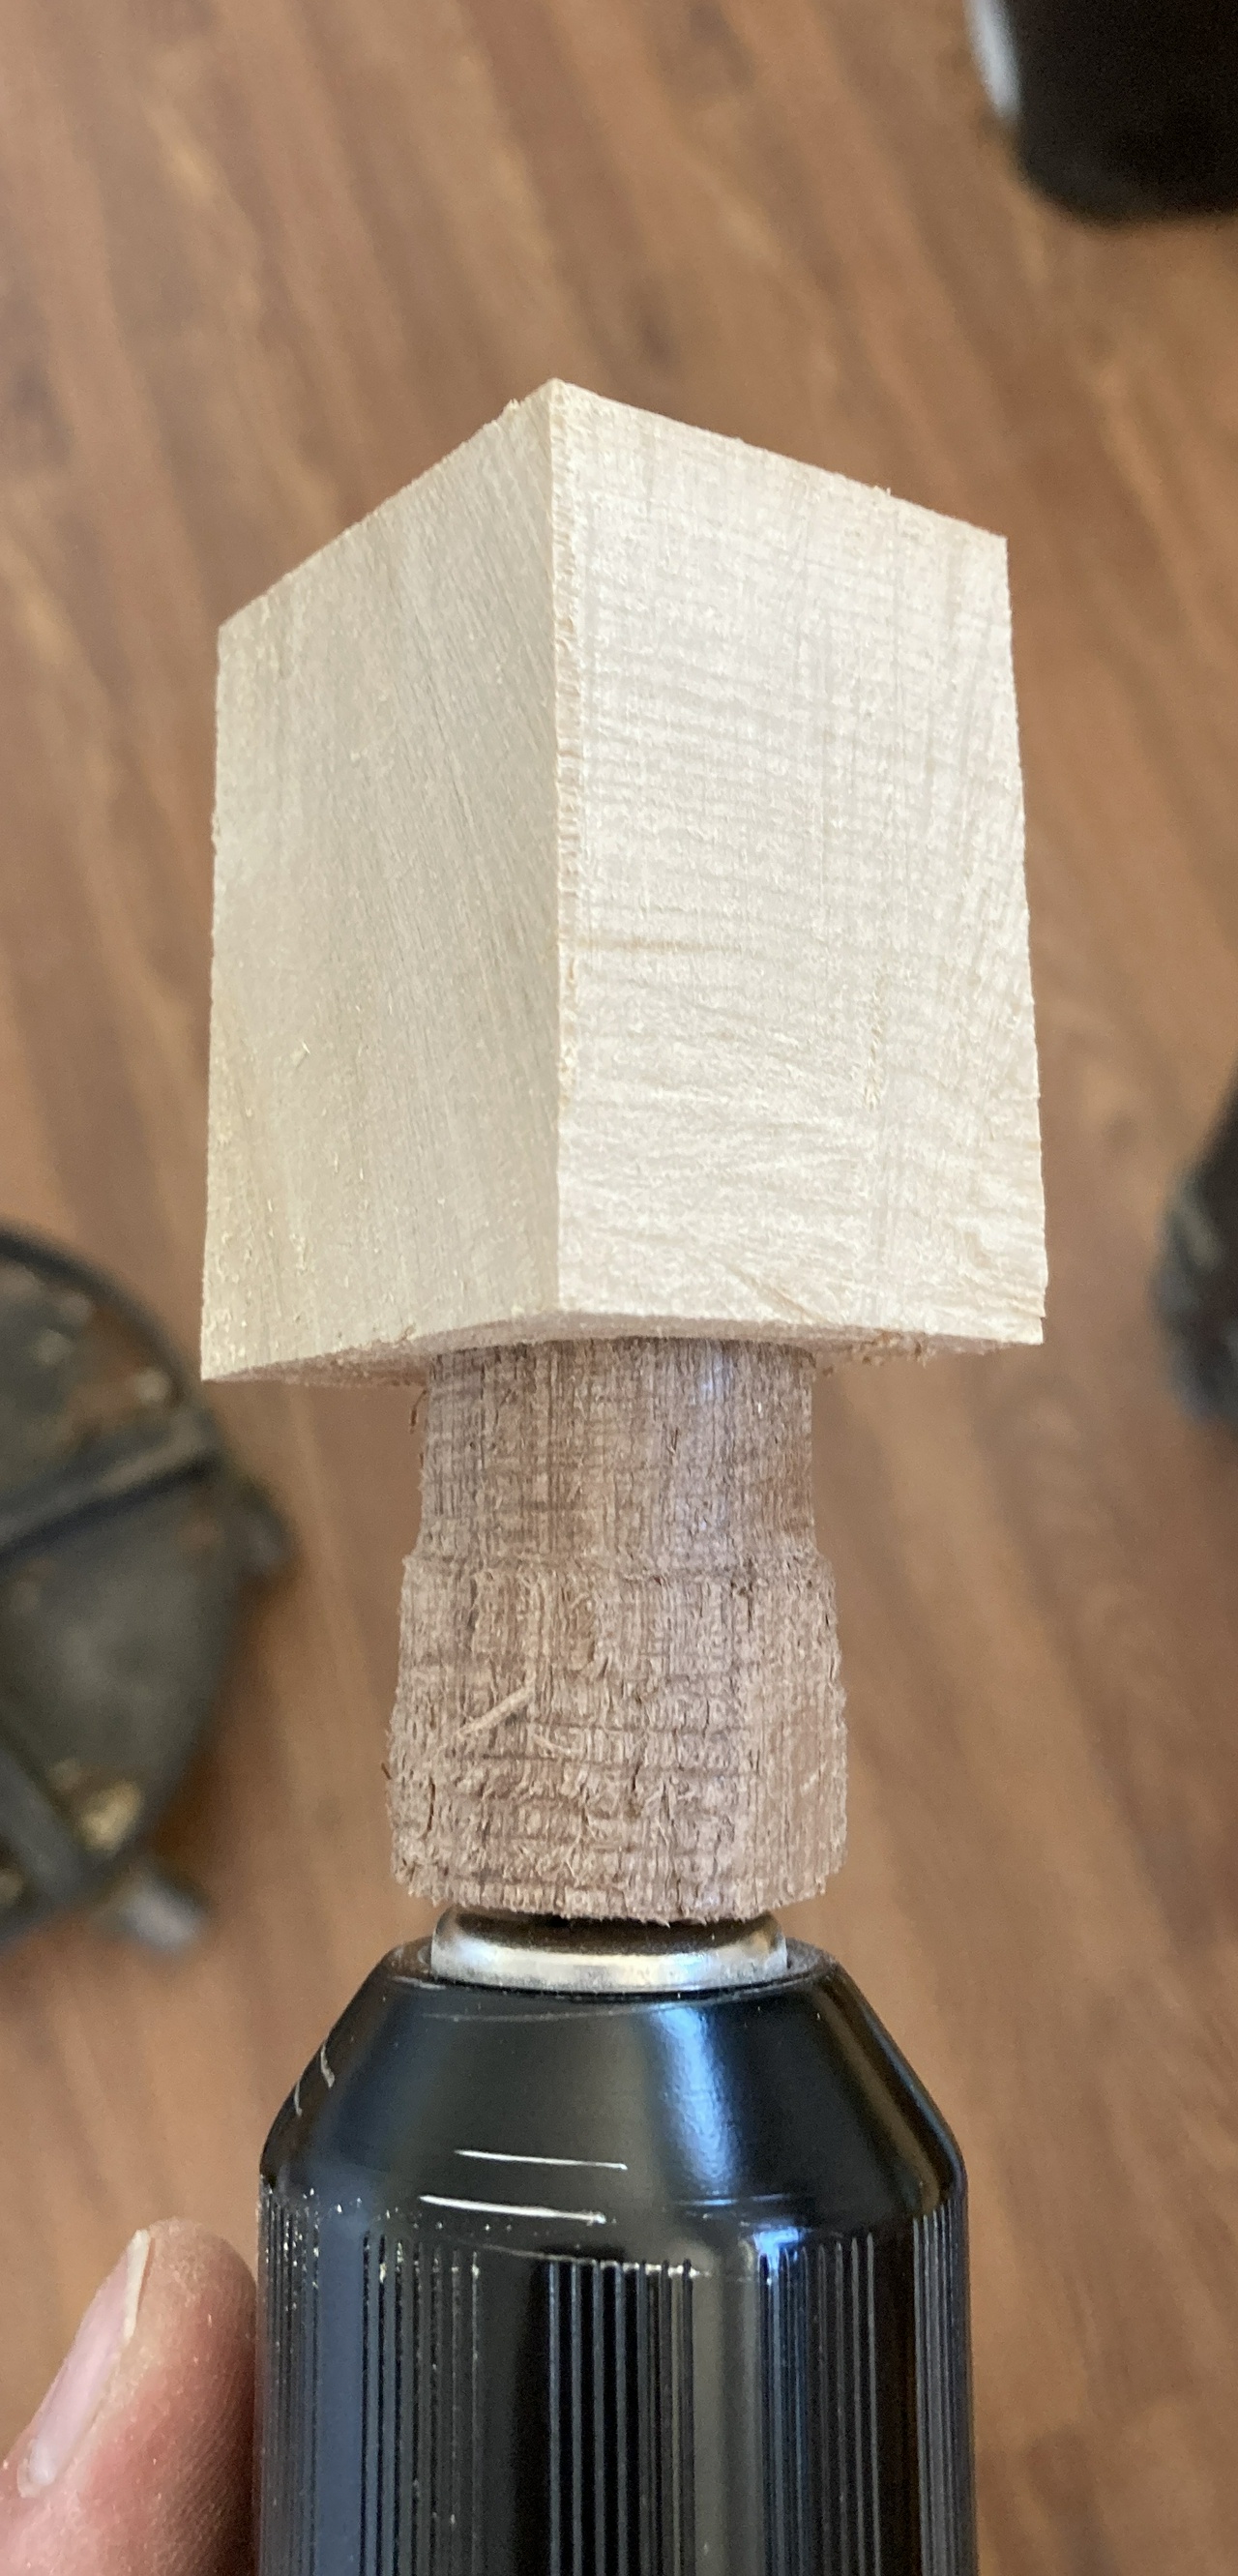
And then the shakers. After thinking about turning them, and cutting my own threads for lids, I decided that was too much to bite off this year, and I bought some shaker inserts from Lee Valley. They're about 15/16 in diameter, and slightly tapered, so I drilled holes in some pieces of birch. I had initially planned to have the grain in the birch running up and down on the finished shaker, but my 15/16ths auger bit has a bad lead screw, and drilling into end-grain in the stabilized birch proved to be too tough, so I oriented the grain cross-wise, which made drilling much easier.
With the holes drilled, I started figuring how to shape the outsides. I had planned to use a spokeshave to turn the birch from squares to octagons, and then to round, but that was when the grain was running the other way. I tried using the shave cross-grain and broke one of the shaker bodies. After some thought, I took one of my walnut offcuts, put a deck screw into it, shaped it roughly round by spinning it against my (running) belt-sander, and decided that would work well enough on the birch.
I also experimented with dyeing the stabilized birch, and decided that for the red and green, I was best using non-stabilized birch, especially after I cracked one of the pieces while rounding it. Learning as I go!
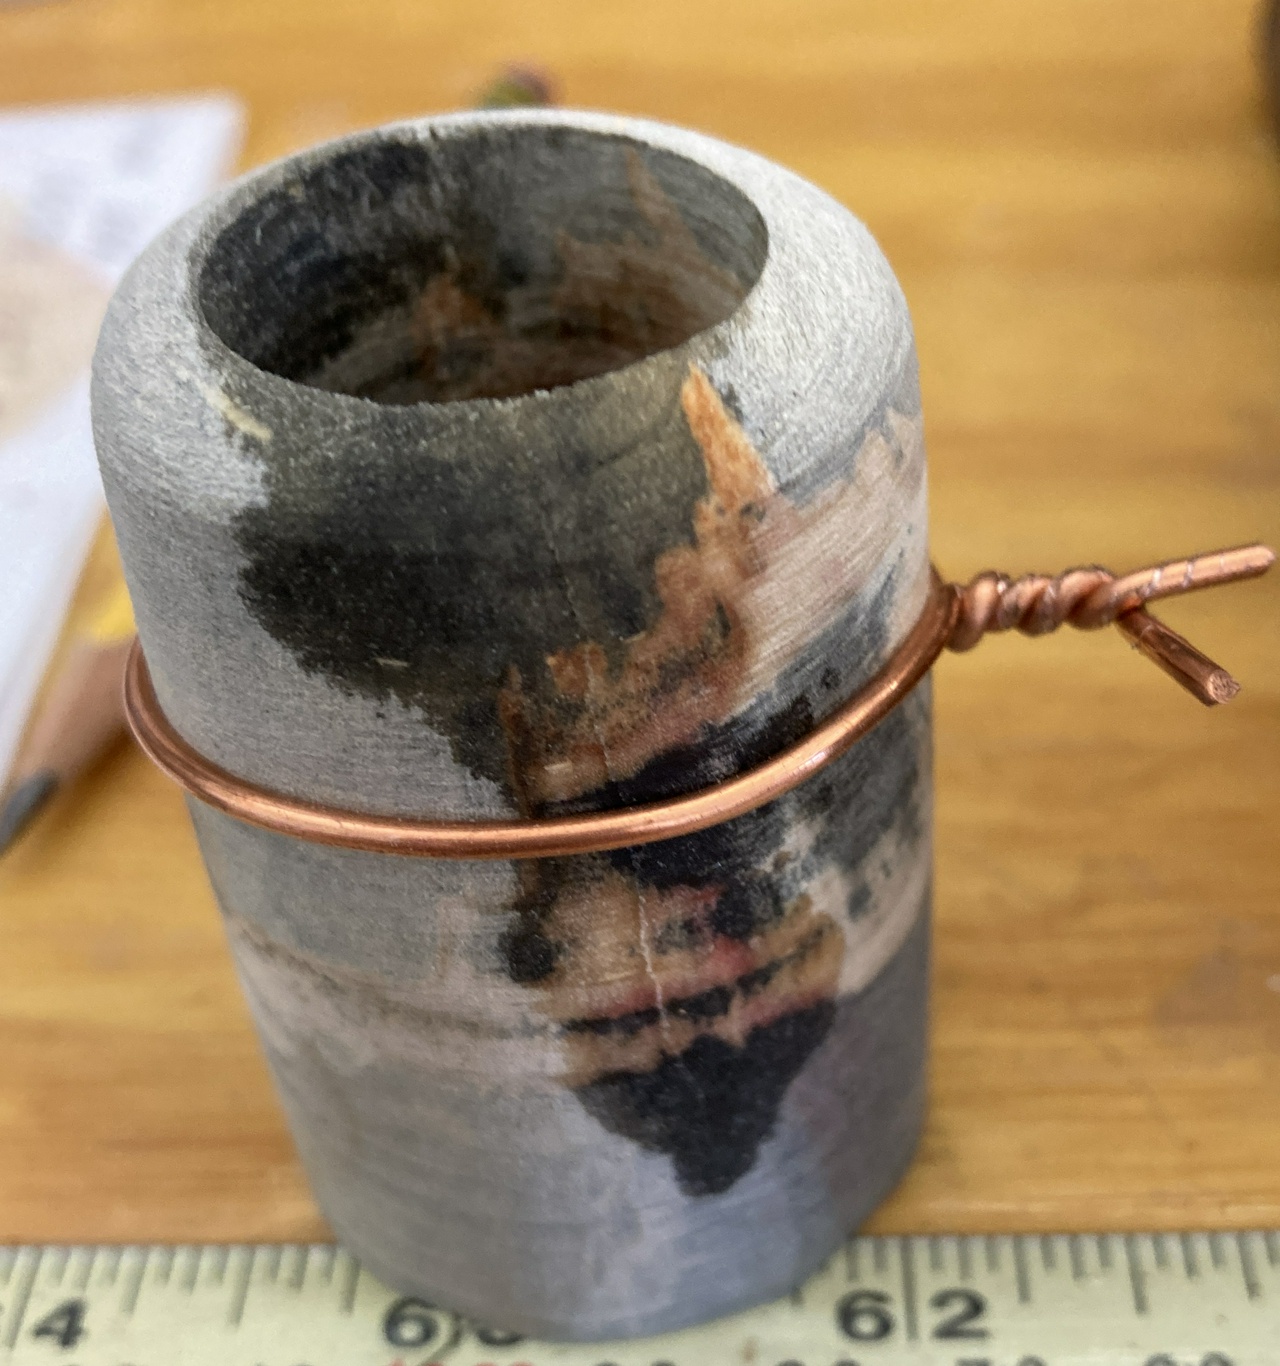
With the four shaker bodies dyed and finished (I used shellac, tinting it with TransTint dyes), I took a tapered reamer to get the holes to the final size, then put a tiny bit of CA glue on the insert, and pressed them into the bodies. I ran a little extra CA in from the bottom to make sure everything held. Note that the inserts say “DO NOT USE EPOXY” and they mean it. The acrylic that's used in the inserts kinda dissolves if you try to epoxy it in place. CA glue is the right glue for this job!
I packed the knife, fork, steel, and four shakers into the case with foam inserts, then packed the case into the flat rate box with a Hock apron, another cow-spotted apron my sweetie found, and tossed in a couple tins of extra chile from New Mexico and the box was full, and ready to be on its way.
And then, of course, I realized I'd forgotten to include the note in the box, so I had to open it up again. At least I remembered to take pictures of the complete stuff for this writeup while I had the box open. ;–)
Discuss...
Reply to this in the fediverse: @davepolaschek@writing.exchange